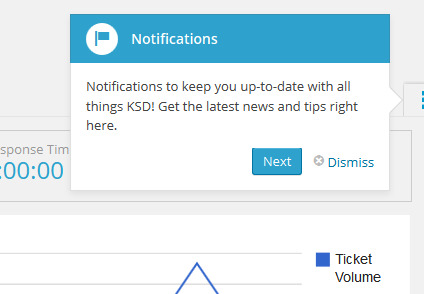
WordPress admin pointers are generally used to give an introductory tour to where different features are in WordPress. They are mainly used by WordPress in the admin section to show you, especially after upgrades, where different (new) functionality is.
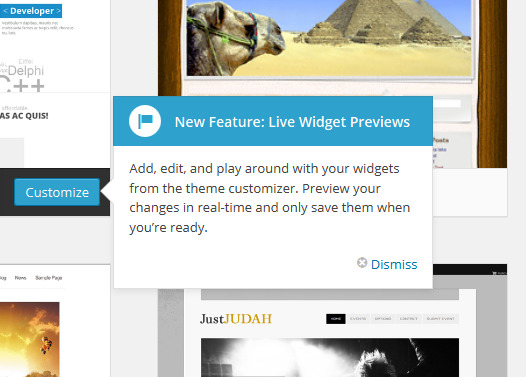
In plugin development, they make it easy for you, the developer, to show off some features pretty easily. If your plugin has a number of sections, chances are one pointer won’t do. You’ll probably require a series of pointers, one leading to another (with a ‘Next’ and ‘Previous’ button). To achieve this for the introductory tour in Kanzu Support Desk(KSD), I used the following code. The explanation is inline
The PHP Code
In your plugin file, use this:
if ( ! class_exists( 'My_Custom_Plugin' ) ) :

class My_Custom_Plugin{

              public function __construct() {
               //Define plugin constants if you haven't already. I recommend calling  a function, $this->define_constants and doing the definitions there
               $this->define_constants();
              // Load admin JavaScript. Do an is_admin() check before calling My_Custom_Plugin
               add_action( 'admin_enqueue_scripts', array( $this, 'enqueue_admin_scripts' ) );
             //Used to disable tour mode
            add_action( 'wp_ajax_my_plugin_disable_tour_mode', array( $this, 'my_plugin_disable_tour_mode' ));

          }
      /**
       * Define plugin constants
       */
      private function define_constants(){
             if ( ! defined( 'MY_PLUGIN_VERSION' ) ) {
        define( 'MY_PLUGIN_VERSION', '1.x.x' );
             }
            if ( ! defined( 'MY_PLUGIN_SLUG' ) ) {
                define( 'MY_PLUGIN_SLUG', 'my-custom-plugin' );
            }

            if ( ! defined( 'MY_PLUGIN_PLUGIN_URL' ) ) {
                define( 'MY_PLUGIN_PLUGIN_URL', plugin_dir_url( __FILE__ ) );
             }
     }

        public function enqueue_admin_scripts() {
                wp_enqueue_script( MY_PLUGIN_SLUG . '-admin-js', MY_PLUGIN_URL.'/assets/js/my-plugin-admin.js', array( 'jquery' ), MY_PLUGIN_VERSION );
                $tour_pointer_messages['my_plugin_intro_tour'] =  $this->load_intro_tour();
                 //Localization allows us to send variables to the JS script. In this case, we are sending the pointers array
                wp_localize_script( MY_PLUGIN_SLUG . '-admin-js',
                                    'my_plugin_admin',
                                    array(  'ajax_url'              =>  admin_url( 'admin-ajax.php'),
                                            'my_plugin_admin_nonce' =>  wp_create_nonce( 'my-plugin-admin-nonce' ),//Not used in this example but important
                                            'my_plugin_tour_pointers'     =>  $tour_pointer_messages
                                        )
                                    );
                                    }

           /**
          * Give the user an introductory tour to your plugin
          * @return Array $pointers Returns an array of pointers or false
          */
         private function load_intro_tour(){
            // Don't run on WP < 3.3. Admin pointers were only introduced in WP 3.3
            if ( get_bloginfo( 'version' ) < '3.3' ){
                return false;
            }
            //Do a check to see whether your user wants to take the tour. You can check
            //a custom plugin setting here like this:
           if ( "no" === get_option('my_plugin_enable_tour') || !get_option('my_plugin_enable_tour') ){
                return false;
            }//This implies that you need to use update_option('my_plugin_enable_tour') to trigger the tour

            //Generate the tour messages
            $pointers = $this->generate_tour_content();

            // No pointers? Then we stop.
            if ( ! $pointers || ! is_array( $pointers ) ){
                return false;
            }
            wp_enqueue_style( 'wp-pointer' );//Needed to style the pointers.
            wp_enqueue_script( 'wp-pointer' );//Has the actual pointer logic

            return $pointers;
         }

         /**
          * The tour content for the different screens
          */

       private function generate_tour_content(){
             //The content is entered into the array based on when it should display since
             //it'll be displayed sequentially i.e. content at $p[0] will come first, then $p[n+1]
             $p[] = array(
                "target" => "#my-id",//Target ID or class
                "screen"  => 0, //Which screen to show the pointer on. This is useful if you have multiple screens to navigate between
                "options" => array(
                    "content" => sprintf( "<span><h3> %s </h3> <p> %s </p><p> %s </p></span>",
                    __( "Title one" ,"my-custom-plugin"),
                    __( "First paragraph of the first item","my-custom-plugin"),
                    __( "More information","my-custom-plugin")
                    ),
                    "position" => array( 'edge' => 'right', 'align' => 'top' )//Edge and alignment gotten using 'Better Admin Pointers' plugin
                    )
            );
            $p[] = array(
                "target" => ".my-class",//Target ID or class
                "screen"  => 1, //Which screen to show the pointer on. This is useful if you have multiple screens to navigate between
                "options" => array(
                    "content" => sprintf( "<span><h3> %s </h3> <p> %s </p></span>",
                    __( "Title two" ,"my-custom-plugin"),
                    __( "This is short and sweet. One paragraph only","my-custom-plugin")
                    ),
                    "position" => array( 'edge' => 'right', 'align' => 'top' )//Edge and alignment gotten using 'Better Admin Pointers' plugin
                    )
            );
            return $p;
         }
         /**
          * Disable tour mode
          */
         public function my_plugin_disable_tour_mode(){
            update_option("my_plugin_enable_tour","no");
            echo json_encode( 1 );
            die();
         }
         }

endif;

return new My_Custom_Plugin();
That covers the PHP end of the logic. Note that finding the best positions for your pointers is pretty tricky; to do it faster, download and install the Better Admin Pointers plugin and create dummy pointers. Use the values you get from testing in your code.
The JavaScript
Now for the JavaScript that does the manipulation:
var pointerContentIndex = 0;
if( my_plugin_admin.my_plugin_tour_pointers.my_plugin_intro_tour ){//If pointers are set, show them off
var pointer = my_plugin_admin.my_plugin_tour_pointers.my_plugin_intro_tour;

/**
* Create a pointer using content defined at pointer[pointerContentIndex]
* and display it on a particular screen. The screen to display
* the pointer on is defined at pointer[pointerContentIndex].screen
* @param int pointerContentIndex
*/
generatePointer = function( pointerContentIndex ){
//Change the active screen
//Add your custom (jQuery) logic to change the plugin screen to the one corresponding to the content at pointerContentIndex
////Remember, you specified the screen at pointer[pointerContentIndex].screen
//In my case, using jQuery tabs, I used this to switch to the correct tab:
// jQuery( "#tabs" ).tabs( "option", "active", pointer[pointerContentIndex].screen );

//Generate the pointer options
options = jQuery.extend( pointer[pointerContentIndex].options, {
close: function() {
/* jQuery.post( my_plugin_admin.ajax_url, {
pointer: 'my_plugin_intro_tour',
action: 'dismiss-wp-pointer'
});//Ordinarily, we'd use this to send an AJAX call to WordPress to disable our pointer
//However, we are manually handling the display ourselves so we don't use this*/
//Disable tour mode
jQuery.post( my_plugin_admin.ajax_url, {
action: 'my_plugin_disable_tour_mode' //In the PHP,there's an action to handle this AJAX callback and
//change the setting you are using to start/stop the tour
});
}
});
//Open the pointer
jQuery( pointer[pointerContentIndex].target ).pointer( options ).pointer('open');
//Inject a "Next" button into the pointer
jQuery( 'a.close' ).after('<a href="#" class="my-plugin-next button-primary">Next</a>');
};

generatePointer( pointerContentIndex );
//Move to the next pointer when 'Next' is clicked
//Event needs to be attached this way since the link was manually injected into the HTML
jQuery( 'body' ).on( 'click', 'a.my-plugin-next', function(e){
e.preventDefault();
//Manually hide the current pointer. We don't close it because if we do, the 'close' function,
//which also disables tour mode, would be called
jQuery(this).parents('.wp-pointer').hide();
if( pointerContentIndex < pointer.length  ){
++pointerContentIndex;
}
else{//End of the tour
//Dismiss the pointer in the WP db
//Disable tour mode
jQuery.post( my_plugin_admin.ajax_url, {
action: 'my_plugin_disable_tour_mode'
});
return;
}
//Open the next pointer
generatePointer( pointerContentIndex );

});
}
The CSS
We need to position the ‘Next’ button we manually injected into the pointer.
.wp-pointer-buttons a.my-plugin-next {
margin-right: 22px;
margin-top: -6px;
}
That should do it.
That’s it! Extending this to add a ‘Previous’ button is easy.
It’s pretty a mouthful but I hope you are up and running. To see the code in action, you could download Kanzu Support Desk and take the intro tour. I used ‘plugin’ throughout the explanation but a theme can use the same logic.